
How to use LIVE Mode on the iphone
If your iPhone has Live Mode and you are either not using it, or are unsure how to use it then this post is for you.
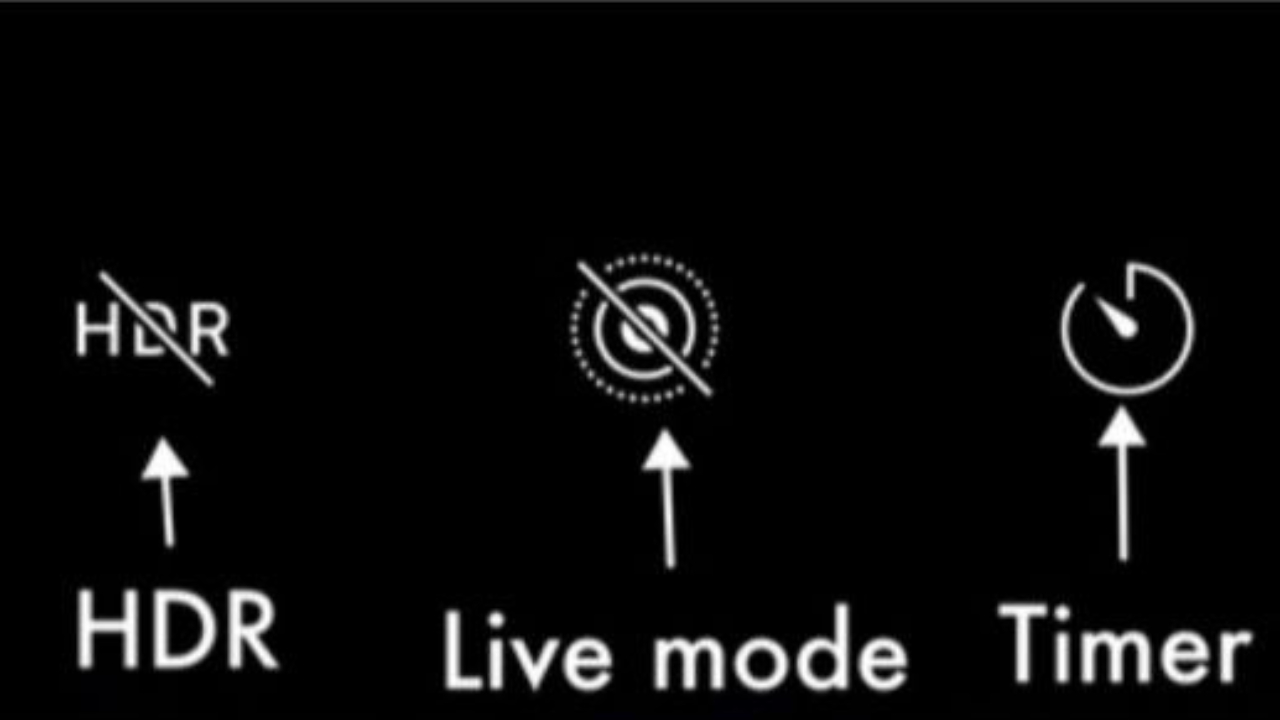
Depending what model iphone you have, will determine the exact location of the Live Mode icon. In the image above, Live Mode is in the middle. It appears as a concentric series of rings. When Live mode is turned off, there is a slash through it as in the photo above.
To active Live Mode, simply click on it and the slash will vanish indicating that Live Mode is now activated.
What is Live Mode?
Live mode works by taking a series of images starting at about one second before the before the shutter button is pushed and another series of images for another second after the shutter button is pressed. All the photos are then stitched together to create a short video.
The most important thing to know about using Live Mode is that you need to have a very steady hand or else use a tripod. If not, you run the risk of having a blurry image as the end result. You also obviously want to have a moving subject or there is no point in activating Live Mode.
How to use Live Mode
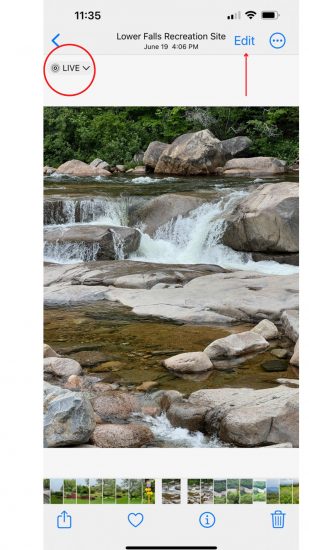
Once you take a photo in Live mode you have several different options to edit the photo. Go into your album and find your image. All images taken in Live mode will have a small Live Mode icon in the upper left hand corner of the photo.
Click on the Live icon and a drop down menu will appear. There are three options to change and modify your image. You can click on loop and the moving subject (in this case the waterfall) will loop over and over so it will appear as a continuous running video.
There is also Bounce. Bounce will run the moving subject backwards and forwards so in the case of the image below the falling water would run up and down the rocks. This is a little gimmicky for me but it can be a fun post for social media.
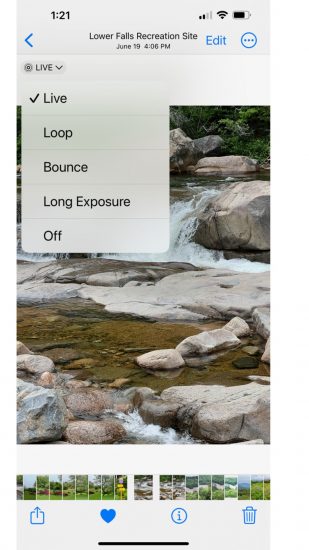
The bottom option is Long Exposure. This will slow down your moving subject and blur the movement. It achieves the same results as if you shot with a third party slow motion app.
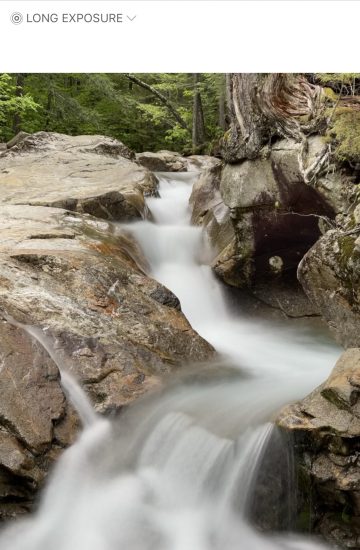
Long exposure in Live Mode
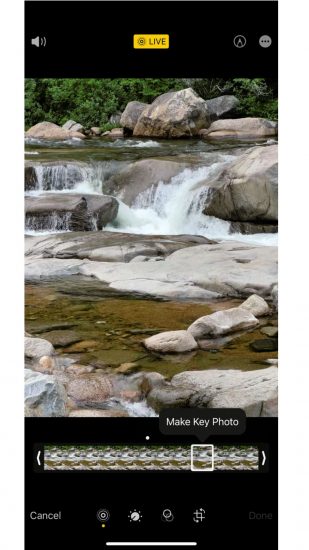
Another thing you can do with a LIVE mode photo is to select the image you want as the featured image, or the one that shows in your album. Click on Edit in the upper right corner.

Once the image is opened, click on the small concentric circles in the lower border. (circled in red).
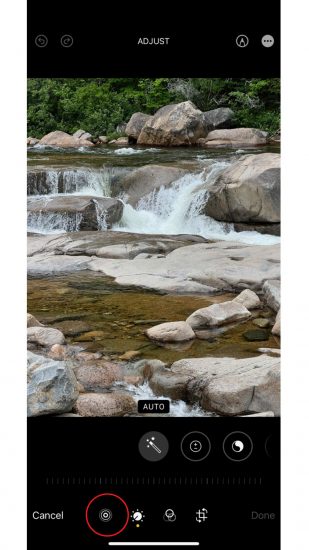
All the images will now show along the bottom. By sliding your finger left or right you can choose which image you would like to “Make Key Photo”.
"Erase" a moving subject using Live Mode
Another editing trick in Live Mode is that you can remove something moving ( like a person, car or animal) that unexpectedly walks into your frame.
While in a busy showroom at AmericasMart, people kept walking into my shot. As a demonstration, I turned on Live mode, held my camera very steady and took a photo as a person walked into my frame.

Then, in editing, I clicked on the Live Mode icon in the upper left corner, scrolled down and selected Long Exposure and voila! the person that walked into my frame magically disappears.

I made a little video of this on Instagram for my Tuesday’s Tip and you can watch it HERE.
If you shoot in Live mode you have the ability to change whatever feature you apply at anytime. In other words you can change long exposure to loop or bounce or change it back to the original image.
If you do try out Live mode and post on Instagram, please tag me. I’d love to see what you do with it!
If you are an interior designer, stager or home professional, and want to take your images to the next level, be sure to check out my value packed class “Smartphone Photography for interior designers”. For more info click on the link below.


What's in My Camera Bag?
If you want to peek behind the magic curtain and start using the exact same tools that I use, click below.